Niektorí používatelia systému Windows, ktorí nedávno inovovali na systém Windows 10, sťažnosti na panel úloh niekoľkokrát úplne zmrazili. Ak k tomu dôjde, používatelia nemôžu kliknúť na žiadny prvok na paneli úloh, tj na ponuku Štart, ikony a upozornenia. Skratky ako Windows + R a Windows + X tiež nefungujú.
Tento problém nemá hlavnú príčinu, pretože je veľmi častý v systéme Windows. Niektorí ho však prepojili s Dropboxom a niekoľkými nefunkčnými aplikáciami. V tomto článku preskúmame rôzne možnosti, pomocou ktorých môžeme vyriešiť tento problém. Patrí sem spustenie skenovania SFC, odinštalovanie určitých aplikácií, spustenie programu Explorer a ďalších.
Metóda 1: Reštartovanie Prieskumníka Windows
- Stlačením klávesov Ctrl + Shift + Esc spustíte Správcu úloh systému Windows.
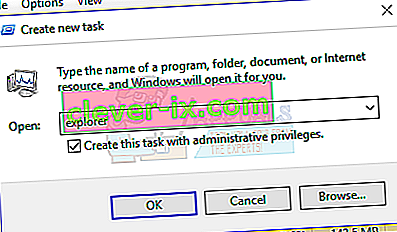
- V Správcovi úloh kliknite na Súbor > Spustiť novú úlohu . Do otvoreného poľa zadajte prieskumník, potom začiarknite políčko „Vytvoriť túto úlohu s oprávneniami správcu“ a kliknite na tlačidlo OK .

Prípadne môžete:
- Stlačením klávesov Ctrl + Shift + Esc spustíte Správcu úloh systému Windows.
- Vyhľadajte program Explorer na karte procesy
- Pravým tlačidlom myši kliknite na položku Prieskumník a vyberte príkaz Reštartovať .
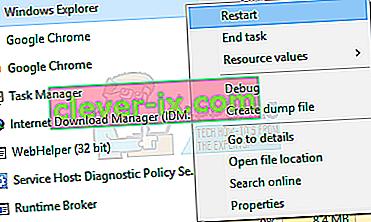
- Prieskumník sa reštartuje a hlavný panel by mal znova začať pracovať

Metóda 2: Spustenie skenovania SFC
- Stlačením klávesov Ctrl + Shift + Esc spustíte Správcu úloh systému Windows.
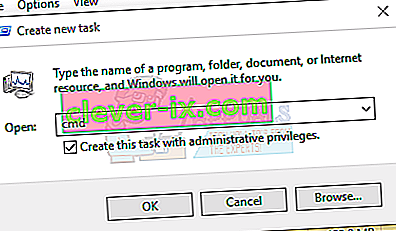
- V Správcovi úloh kliknite na Štart> Spustiť novú úlohu . Do otvoreného poľa zadajte príkaz cmd, potom začiarknite políčko „Vytvoriť túto úlohu s oprávneniami správcu“ a kliknite na tlačidlo OK .
- Na príkazovom riadku zadajte nasledujúce príkazy a po každom príkaze stlačte kláves Enter:
sfc / scannow dism / Online / Čistiaci obraz / Obnoviť zdravie
Spustí sa kontrola systémových súborov a opravia sa všetky poškodené systémové súbory vo vašom počítači.
- Reštartujte počítač a skontrolujte, či zmrazený hlavný panel prestal.

Metóda 3: Oprava Powershell
Pomocou tohto príkazu Powershell môžete zmraziť ukotvený panel úloh pomocou týchto krokov.
- Ctrl + Shift + Esc spustíte Správcu úloh systému Windows.
- Kliknite na Viac podrobností , vyberte kartu Služby a uistite sa, že je spustený program MpsSvc (brána Windows Firewall).
- Stlačením klávesu Windows + R otvorte výzvu Spustiť. Do príkazového riadka napíšte PowerShell a stlačte kláves Enter.
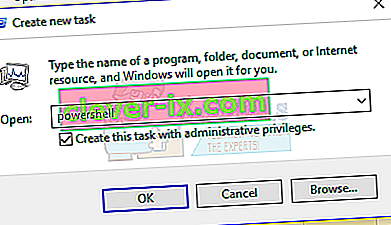
Ak sa výzva Spustiť nepodarí otvoriť, stlačením klávesov Ctrl + Shift + Esc spustite Správcu úloh systému Windows, kliknite na Štart> Spustiť novú úlohu . Do otvoreného poľa zadajte príkaz powerhell, potom začiarknite políčko „Vytvoriť túto úlohu s oprávneniami správcu“ a kliknite na tlačidlo OK .
- V okne Powershell prilepte nasledujúci príkaz a stlačte kláves Enter:
Get-AppXPackage - AllUsers | Foreach {Add-AppxPackage -DisableDevelopmentMode -Register “$ ($ _. InstallLocation) \ AppXManifest.xml”}. - Váš hlavný panel by potom mal byť plne funkčný.

Metóda 4: Povolenie správcu používateľov
Zakázaný Správca používateľov môže mať za následok zablokovanie hlavného panela systému Windows 10. Skúste znova povoliť Správcu používateľov pomocou týchto krokov.
- Stlačte kláves Windows + R , zadajte services.msc a kliknite na OK . Týmto sa otvorí konzola služieb.
- Vyhľadajte Správcu používateľov a dvakrát naň kliknite.
- Nastavte typ spustenia na automatický a spustite službu, ak bola zastavená. Kliknite na tlačidlo OK .

- Reštartujte počítač a panel úloh by mal v súčasnosti fungovať perfektne.

Metóda 5: Odinštalovanie aplikácií
Niektorí používatelia identifikovali určité aplikácie, ktoré spôsobili správne fungovanie panela úloh. Tieto aplikácie sú Dropbox a Classic Shell . Ak máte podozrenie, že to spôsobujú nejaké aplikácie, môžete ich tiež odstrániť.
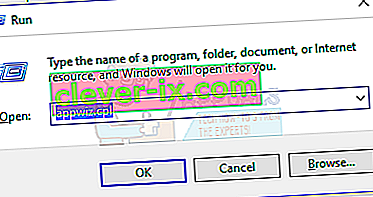
- Stlačením klávesov Windows + R otvorte výzvu na spustenie. Typ appwiz. cpl a stlačte kláves Enter .
- Vyhľadajte aplikáciu v zozname nainštalovaných aplikácií a potom na ňu dvakrát kliknite. Odinštalovanie dokončite podľa pokynov.
- Reštartujte počítač a potom skontrolujte, či hlavný panel teraz správne funguje.

Metóda 6: Zakázanie naposledy otvorených položiek
Nedávno otvorené položky môžu spomaliť spustenie zoznamu. Ich vypnutím to zrýchlite a zabránite zamrznutiu. Podľa týchto pokynov zakážete nedávno otvorené položky.
- Stlačením klávesov Win + I otvorte aplikáciu Nastavenia.
- Prejdite na Personalizácia> Štart
- Posunutím prepínacieho tlačidla vedľa položky Zobraziť naposledy otvorené položky v zozname odkazov na paneli Štart alebo na paneli úloh ho vypnete.

- Váš panel by nemal pri ďalšom reštarte zamrznúť pri štarte

Metóda 7: Obnovenie predvolených služieb systému Windows 10
Ak v tomto okamihu nefungovala žiadna z vyššie uvedených metód, skúste spustiť tento skript ako správca tak, že naň kliknete pravým tlačidlom myši a vyberiete príkaz Spustiť ako správca . Ak WiFi z nejakého dôvodu nefunguje, postupujte podľa pokynov tu (v metóde 3 - krok 2: možnosť 2) a problém WiFi vyriešte.
Metóda 8: Vytvorenie nového používateľského účtu
V niektorých situáciách sa chyba môže spustiť, ak nastavenia alebo konfigurácie vášho používateľského účtu neboli správne nastavené a tiež ak dôjde k poškodeniu týchto konfiguračných údajov. Alternatívne sa preto môžete pokúsiť vytvoriť nový používateľský účet na počítači so systémom Windows 10 a potom importovať údaje zo staršieho účtu neskôr, ak sa problém vyrieši. Za týmto účelom:
- Stlačením klávesov „Windows“ + „I“ otvorte nastavenia a kliknite na možnosť „Účty“ .
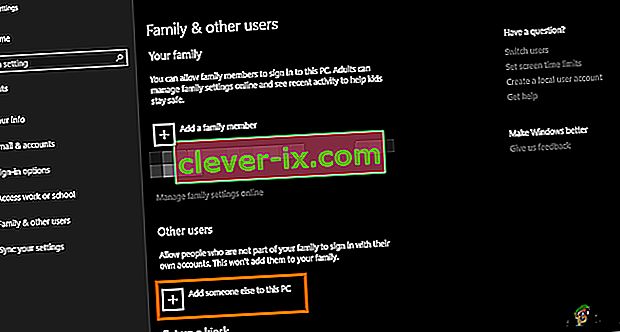
- V možnosti účtov kliknite na ľavej strane na ikonu „Rodina a ďalší používatelia“ .
- V ponuke vyberte možnosť „ Pridať niekoho iného do tohto počítača “.
- V ďalšom okne kliknite na tlačidlo „ Nemám prihlasovacie údaje tejto osoby “.
- V novom okne, ktoré sa zobrazí, kliknite na možnosť „Pridať používateľa bez účtu Microsoft“ .

- Zadajte používateľské meno používateľského účtu a pridelte mu heslo.
- Zadajte bezpečnostné otázky, odpovedzte na ne a potom kliknite na možnosť „Ďalej“ .
- Po vytvorení tohto účtu na ňu kliknite a potom vyberte možnosť „Zmeniť typ účtu“ .
- Kliknite na rozbaľovaciu ponuku „Typ účtu“ a potom vyberte možnosť „Správca“ .
- Uložte zmeny a prihláste sa do tohto účtu.
- Po prihlásení do účtu spustite Steam a skontrolujte, či hra beží.


Ak to vyriešite vo svojom počítači, nezabudnite importovať údaje používateľského účtu z predchádzajúceho účtu do tohto nového a naďalej ich normálne používať.
Metóda 9: Diagnostika v núdzovom režime
Možno ste niekedy do počítača nainštalovali aplikácie tretích strán, ktoré vám môžu brániť v správnom spustení panela úloh alebo s ním spojených služieb. Okrem toho je možné, že dokonca aj služba Windows alebo Microsoft bráni riadnemu fungovaniu počítača. Preto v tomto kroku diagnostikujeme tento problém v bezpečnom režime a potom skontrolujeme, či sa dá opraviť. Pre to:
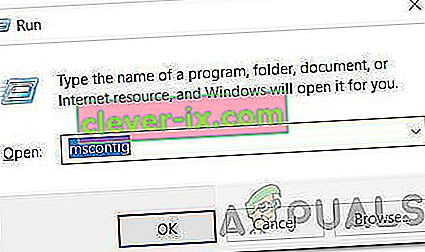
- Stlačením klávesov „ Windows“ + „ R“ spustíte výzvu na spustenie.
- Napíšte „ MSCONFIG“ a stlačte „ Enter“, aby ste otvorili konfiguračné okno Microsoftu.
- V tomto okne kliknite na kartu „Služby“ a zrušte začiarknutie políčka „Skryť všetky služby spoločnosti Microsoft“.
- Po zrušení začiarknutia tejto možnosti kliknite na tlačidlo „Zakázať všetko“ a kliknutím na tlačidlo „Použiť“ zmeny uložte.
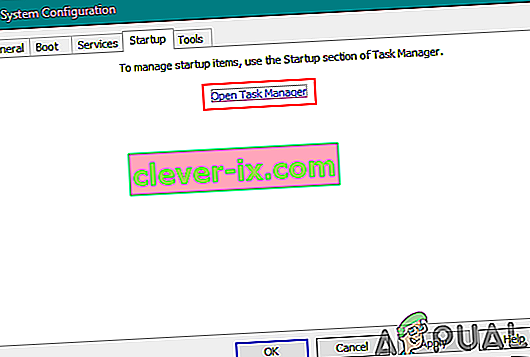
- Potom kliknite na kartu „Spustenie“ a potom kliknutím na tlačidlo „Otvoriť správcu úloh“ spustite správcu úloh.
- V Správcovi úloh kliknite na každú aplikáciu, ktorá bola povolená, a potom kliknite na tlačidlo „Zakázať“ , aby ste zabránili jej spusteniu pri štarte.
- Reštartujte počítač a spustite sa v bezpečnom režime.
- V bezpečnom režime skontrolujte, či panel úloh po nejakom čase alebo dokonca pri štarte zamrzne.
- Ak panel úloh v tomto režime nezmrzne, znamená to, že problém spôsobovala aplikácia alebo služba tretej strany.
- Začnite postupne povoľovať aplikácie a skontrolujte, vďaka ktorej sa problém vráti.
- Ak sú všetky aplikácie v poriadku, začnite postupne povoľovať služby a skontrolujte, vďaka ktorej z nich sa problém vrátil.
- Problémovú službu / aplikáciu nechajte vypnutú alebo ju skúste znova nainštalovať / aktualizovať.


Metóda 10: Obnovenie systému
Niektorí používatelia zistili, že vykonaním jednoduchého obnovenia predchádzajúceho pracovného dňa sa ich problém vyriešil, ale budete musieť starostlivo zvoliť bod obnovenia, ktorý budete obnovovať. Namiesto použitia automatického obnovenia sa odporúča tento proces prejsť ručne. Ak chcete vykonať tento krok, postupujte podľa pokynov nižšie.
- Stlačením klávesov „Windows“ + „R“ otvorte výzvu Spustiť.
- Zadajte „rstrui“ a stlačte „Enter“, aby ste otvorili okno správy obnovy.
- Kliknite na „Ďalej“ a začiarknite možnosť „Zobraziť viac bodov obnovenia“ .
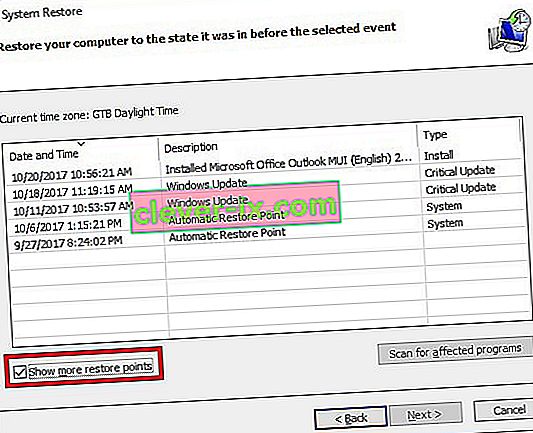
- Vyberte bod obnovenia v zozname, ktorý je starší ako dátum, kedy sa vo vašom počítači začal vyskytovať tento problém.
- Znova kliknite na „Ďalej“ a podľa pokynov na obrazovke obnovte všetko späť na dátum, ktorý ste vybrali z okna obnovenia.
- Skontrolujte, či sa tým problém so zablokovaným panelom úloh nevyrieši.


Metóda 11: Prepínanie systémových ikon
Je možné, že v niektorých prípadoch môže byť nastavenie ikony systému vo vašom počítači chybné, kvôli čomu sa tento problém spúšťa. V tomto kroku preto prepneme tieto ikony a potom skontrolujeme, či sa tým problém nevyrieši. Pre to:
- Stlačením „Windows“ + „I“ otvorte nastavenia a kliknite na možnosť „Personalizácia“ .
- Na ľavej strane kliknite na tlačidlo „Hlavný panel“ .
- Pod nadpisom Oblasť oznámení kliknite na tlačidlo Zapnúť alebo vypnúť ikony systému .

- Všetky ikony v nasledujúcom okne môžete postupne prepínať tak, že ich na niekoľko sekúnd vypnete a potom znova zapnete.
- Po dokončení tohto procesu zatvorením tohto okna prejdite späť na pracovnú plochu.
- Skontrolujte, či sa tým problém vyriešil.


Metóda 12: Spustite Poradcu pri riešení problémov s údržbou systému Windows
Je možné, že vo vašom počítači môžu zostať zvyšky súborov, kvôli ktorým je nedostatok systémovej stránkovacej pamäte alebo ak zostávajú skratky z určitých aplikácií, čo tiež môže zabrániť správnemu fungovaniu panela úloh. Preto v tomto kroku spustíme Poradcu pri riešení problémov s údržbou systému Windows a potom skontrolujeme, či sa tým problém vyrieši. Pre to:
- Press “Windows’ + “R” to open the Run prompt.
- Type in “Control Panel” and press “Enter” to launch the classical control panel interface.

- Click on the “View By:” option from the top and select the “Large Icons” option from the menu.
- In the next window, click on the “Troubleshooting” option and then click on the “Run Maintenance Tasks” button.
- In the window that pops up, click on the Next button, and provide administrative privileges to successfully run this task.
- Wait for the Maintenance to be completed and check to see if doing so has fixed the issue with the frozen taskbar.


Method 13: Use DDU to Perform a Clean Install
In some cases, it is possible that the Graphics Card installed on the system might have a faulty driver installed due to which this issue is being triggered. Therefore, in this step, we will be performing a Clean install of the Graphics Driver by uninstalling the Driver using DDU and then we will check to see if doing so has fixed the issue with the Taskbar. For that:
- Make sure to back up any important data before performing this step in case something goes unexpected.
- Download the DDU software from this website.
- After downloading the software, extract the zip file and open the folder where it has been extracted.
- Run the “.exe” file inside the folder and it will automatically further extract inside the same folder.
- Open the newly extracted folder and click on the “Display Driver Uninstaller.exe”.
- Click on the “Select Device Type” dropdown and select “GPU”.
- In the other dropdown, select the manufacturer of your GPU and then click on the “Clean and do not Restart” option.
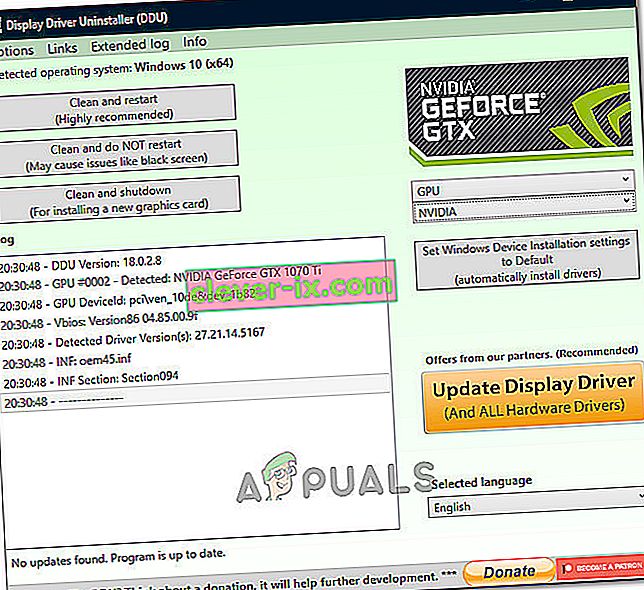
- This will uninstall the device driver for your GPU and it should automatically shift to the Microsoft Basic Visual Adapter.
- After uninstalling this software, download the GPU driver from your manufacturer’s website by specifying your exact make and model.
- Install this software on your computer and then check to see if doing so fixes the taskbar freezing issue on your computer.

Method 14: Stopping Windows Service
In some situations, it is possible that a certain Windows service might need to be stopped from the task manager. Therefore, in this step, we will be preventing it from running in the background as it has likely hanged due to which the taskbar is being frozen. In order to stop this service:
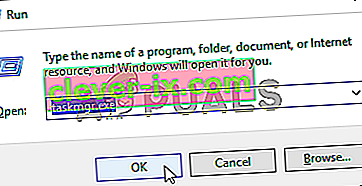
- Press “Windows’ + “R” to open the Run prompt.
- Type in “taskmgr” and press “Enter” to open the Task Manager.
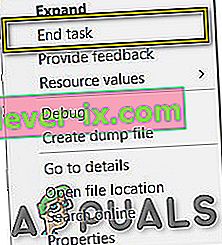
- Click on the “Processes” tab and from the list, click on the “Service Host: DCOM Server Process Launcher” service.
- Click on the “End Task” button and close out of the task manager.
- After closing out of the task manager, check to see if doing so has fixed the frozen taskbar situation.

Method 15: Stop Microsoft Edge and Remove it from Taskbar
In some situations, the default browser that comes installed with Microsoft Windows might just be the culprit behind this whole issue. If you are using another browser as your go-to default browser, you might see that using the Microsoft Edge browser causes issues with the taskbar. Therefore, in this step, we will be stopping Microsoft Edge from the Task Manager and then we will remove it from the taskbar. For that:
- Press “Windows’ + “R” to lauch the Run prompt.
- Type in “taskmgr” and press “Enter” to open the Task Manager.
- Click on the “Processes” tab and from the list, click on the “Microsoft Edge” browser.
- Click on the “End Task” button and close the task manager.
- If the Taskbar is still frozen, restart your computer and repeat this process.
- After doing so, right-click on the Microsoft Edge icon in the taskbar.
- Select the “Unpin from Taskbar” option to remove Microsoft Edge from your taskbar.
- Check to see if doing so fixes the issue.

Method 16: Remove Outdated References
It is possible that your Registry might be plagued with outdated references to an old operating system that you might’ve upgraded from. Even if you have removed the Windows.old folder from your computer, some driver and registry files might still be associated with the “Windows.old” folder which practically doesn’t exist on your computer and this misconfiguration might prevent your computer from working properly. Therefore, in this step, we will be removing it from the registry editor. For that:
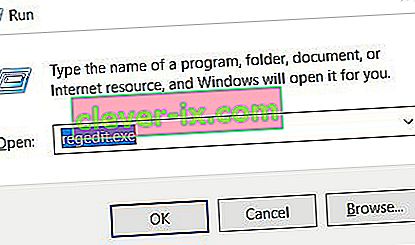
- Press “Windows’ + “R’ to open the Run prompt.
- Type in “regedit” and press “Enter” to open the registry editor.
- Press “Ctrl” + “F” to open the finder and type in the “c:\windows.old” line and press “Enter” to find any registry related entries.
- Delete or remove any such entries that refer to this and run an SFC scan to check for any missing files.
- Make sure to install any missing drivers using Driver Easy and then check to see if the Frozen Taskbar issue has been fixed.

Method 17: Rollback Updates
In some situations, Windows might’ve acquired some updates that are preventing your computer from functioning properly and due to this, the taskbar feature has been broken. Therefore, in this step, we will be rolling back some recently installed updates and then we will check to see if doing so fixes the frozen taskbar issue. In order to do that:
- Press “Windows’ + “I” buttons on your keyboard to open the Windows settings.
- In the Windows Settings, click on the “Update and Security” button and from the left pane, select “Windows Update”.
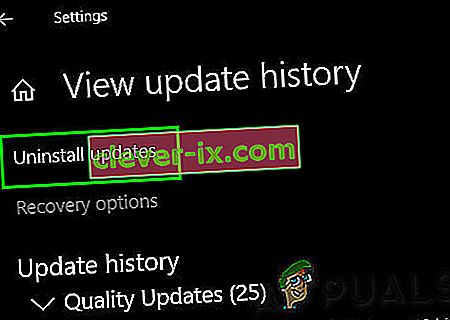
- On the next screen, select the “Update History” button and it should lead to a new window.
- In the new window, there should be an “Uninstall Updates” button and by clicking on it, a prompt should open that should enable you to be able to uninstall an update.
- Follow the on-screen instructions to be able to fully remove the update and check to see if the issue persists after doing so.


Method 18: Signing out of Account
It is possible that the Windows Taskbar is getting frozen due to a glitch during the account login. Therefore, we can test this out by simply signing out of our account and then signing back in to ensure that the account is logged in properly and that it is properly registered with the Microsoft Servers. In order to do so:
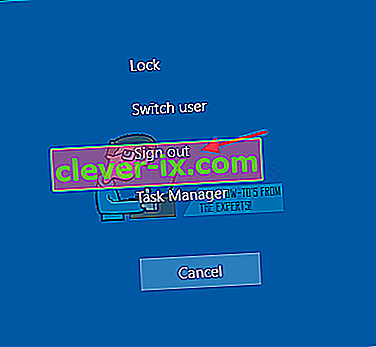
- Press “Ctrl” + “Alt” + “Del” buttons on your keyboard to open up the account options.
- Click on the “Sign out” option from the screen to log out of your account.
- Wait for Windows to completely sign you out of your account and confirm any prompts on your screen to complete the sign-out process.
- Select your account and sign back into your account from the next screen by entering your login details.
- Check to see if doing so has fixed the frozen taskbar issue on your account.

Method 19: Creating Batch File
Most people found that restarting the Windows Explorer fixed their issue but for some of them, it kept coming back after a while. Therefore, in this step, we figured out a way for the people that can solve it by restarting but all they will have to do is click on a batch file present on their desktops. For that:
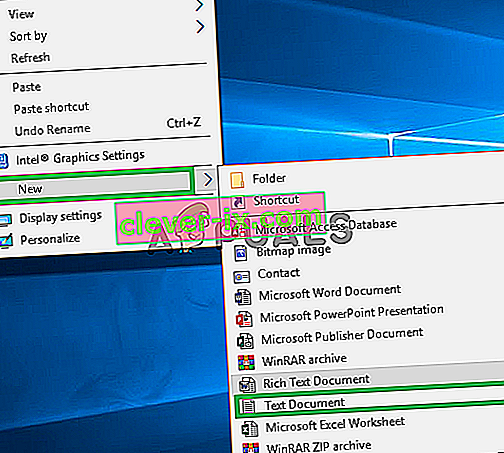
- Right-click anywhere on your desktop and select the “New>” option.
- Click on the “Text Document” option and a new text document will be created on your desktop.
- Open this text document and paste the following lines inside of the text document.
taskkill /f /IM explorer.exe start explorer.exe exit
- Click on the “File” option at the top left of the window and select the “Save As” option.
- Enter the “TaskMRestart.bat” as the file name and select “All Files” from the “File Type” dropdown.
- Save this file on your desktop and exit out of the document.
- Now, double-clicking on this newly saved file should automatically restart File Explorer which should fix the Frozen taskbar issue within a second.
- You can just click on the file whenever the taskbar freezes and it should fix itself.

Method 20: Perform an Update
The frozen taskbar issue was a very famous topic on most Microsoft forums and apparently a lot of Microsoft officials took note of it. Therefore, it is possible that this issue might’ve been fixed for some people in recent updates released by Microsoft. Therefore, in this step, we will be checking for any available updates from Microsoft and installing them on our devices. For that:
- Press “Windows” + “I” to open the settings.
- In the settings, click on the “Update and Security” option and then select the “WindowsUpdate” button from the left side.
- In the Windows Update, click on the “Check for Updates” button and a prompt will be registered that will automatically check for any newly available updates.
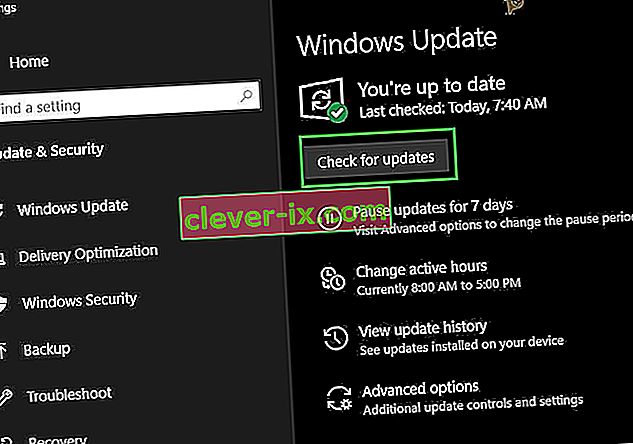
- Install these updates on your computer by following the on-screen instructions and restart your computer.
- Check to see if installing these updates fixes the issue on your computer.

Method 21: Unpinning Items from Start Menu
Some people like to pin important items to the start menu for ease of access and increased productivity. However, as it stands, some Windows users have been facing the frozen taskbar issue due to these pinned items. Therefore, in this step, we will be unpinning some items from the start menu and the taskbar and then we will check to see if doing so fixes the frozen taskbar bug.
- Press the “Windows” button on your keyboard to launch the start menu.
- Inside the start menu, right-click on a tile on the right side of the start menu.
- Select the “Unpin from Start Menu” button to remove the item from the Start menu tiles.
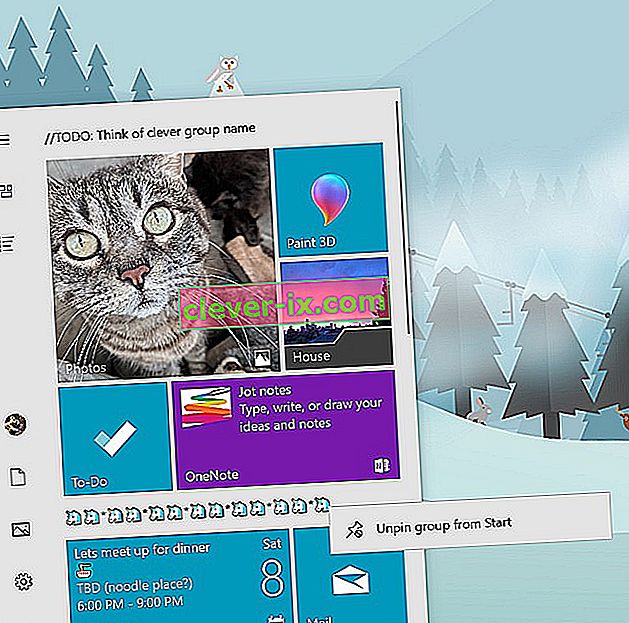
- After removing some items, check to see if the bug is fixed.
- Try removing all the items that can be removed if the bug comes back and check again.
- For a more accurate removal, try removing all the programs from the taskbar and the Start menu that try to connect to the internet, for example, Microsoft Edge, Cortana, News, etc.

Method 22: Disable Items from Bios
It is possible in some cases that the computer’s Bios has been improperly configured due to which the Windows Taskbar is getting frozen time and time again. Therefore, in this step, we will first be booting inside the Bios from which we will disable an option that should get rid of this problem if it was based around the Bios. In order to do so:
- Na klávesnici stlačte tlačidlo „Windows“ a kliknite na ikonu „Tlačidlo napájania“ .
- V zozname vyberte možnosť „Reštartovať“ a počkajte, kým počítač vyzve na reštartovanie.
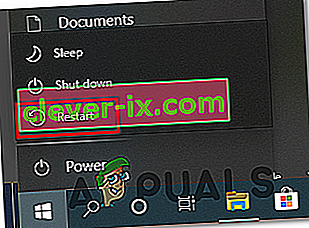
- Keď sa počítač vypne a začne sa bootovať, stlačte klávesu „Del“, „F12“ alebo „F11“ podľa toho, ako sa vaša základná doska bootuje z biosu počítača.
- Od bios, prechádzať cez rôzne nastavenia, kým nenájdete "iGPU Multi-Monitor" funkcie.
- Zakážte túto funkciu vo vnútri systému Bios a spustite systém Windows.
- Skontrolujte, či vypnutie tejto funkcie fungovalo, a opravte chybu ukotveného panela úloh.


